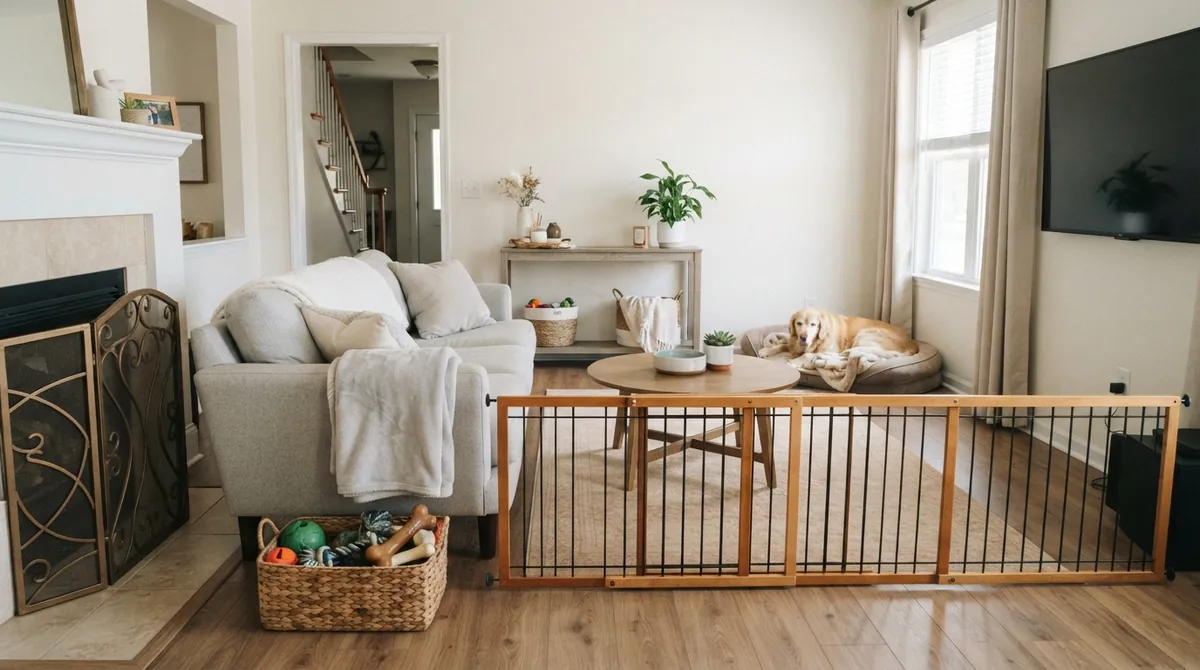
Dog-proofing is mostly about preventing rehearsal of dangerous or expensive mistakes. Secure food, medication, rubbish, cords, cleaning products, laundry, small swallowable objects and escape routes before relying on training. A well-managed home gives the dog more freedom over time because success becomes the default instead of a constant contest over forbidden items.
Kitchen
Secure bins, keep chocolate, grapes, xylitol products, alcohol and medications out of reach, and never leave cooked bones or skewers accessible.
Bathroom
Close medication and supplement cabinets, store cleaners safely and keep razors or small swallowable objects off the floor.
Living areas
Manage electrical cords, batteries, children's toys and reclining furniture mechanisms. Check houseplants before assuming they are pet-safe.
Bedroom and laundry
Laundry piles can hide socks and underwear that some dogs swallow. Store nicotine products, cosmetics and medication securely.
Garden and garage
Check gates, fertilizers, pesticides, rodenticides, antifreeze and mushrooms. Keep automotive chemicals inaccessible.
Build habits, not just barriers
A dog-proof home works best when everyone in the household knows which items require immediate cleanup and which doors or gates must remain secured.
A practical plan you can use this week
Set up the easy version
Begin with walk through the home at dog-eye level with a basket and collect anything chewable, toxic, sharp, string-like or small enough to swallow. Keep the first repetitions deliberately easy. A dog who can succeed has a clear behavior to repeat; a dog who is already over threshold or physically struggling is mostly rehearsing the problem.
Make the first repetition obvious
For the first session, secure the kitchen and rubbish first because food packaging, bones, sweeteners and cleaning products create common high-risk opportunities. The goal is not endurance. It is a clean, understandable success that can be repeated before adding duration, distance or distraction.
Progress one variable at a time
Once the easy version is fluent, use gates and closed doors to control access, then gradually open areas as the dog proves reliable with supervision. If performance suddenly falls apart, reduce difficulty rather than repeating the cue more loudly or assuming the dog is being defiant.
Transfer the skill to ordinary life
Real progress comes from using the skill where it matters. repeat the audit after holidays, guests, deliveries, children’s play sessions and home projects when new objects appear. Short planned repetitions in normal routines are usually more valuable than one long weekend session.
Track the change you can actually see
Use a simple success marker: fewer emergency “drop it” moments, less scavenging, and the dog spends more time choosing legal chews, beds and toys on their own. A written weekly note makes gradual improvement visible and helps you avoid changing the plan after one unusually good or difficult day.
Real-World Tip & Practical Observation
The most revealing test is to leave the room for sixty seconds and photograph what the dog can reach—not to test the dog, but to test the environment. Counter edges, handbags, children’s snacks and bathroom bins are easy for humans to overlook. Move those temptations before they become a training problem.
Common mistakes that make the problem harder
- Assuming an object is safe because the dog ignored it yesterday.
- Leaving medication or sugar-free gum inside bags placed on the floor.
- Using baby gates that the dog can jump, push or squeeze through.
- Giving full-house freedom immediately after adoption or during adolescence.
What progress should look like
Good management should become less visible over time. As the dog builds reliable habits, you can deliberately expand access instead of discovering the limits through destruction or ingestion.
An owner checklist for the next seven days
Day one is for observation and setup: walk through the home at dog-eye level with a basket and collect anything chewable, toxic, sharp, string-like or small enough to swallow. On the next two days, use this first step: secure the kitchen and rubbish first because food packaging, bones, sweeteners and cleaning products create common high-risk opportunities. Keep sessions short enough that you can stop after a good repetition rather than waiting for the dog to become tired, frustrated or distracted. Write down what happened immediately before the behavior, what you did, and what the dog did next. That simple record is more useful than relying on memory at the end of the week.
From days four through seven, change only one difficulty at a time. use gates and closed doors to control access, then gradually open areas as the dog proves reliable with supervision. Use this practical measure: fewer emergency “drop it” moments, less scavenging, and the dog spends more time choosing legal chews, beds and toys on their own. If the numbers or observations get worse for two sessions in a row, make the task easier and rebuild success. The aim is not a perfect dog by Sunday; it is a repeatable routine that gives the dog clear information and gives you evidence that the plan is moving in the right direction.
Frequently asked questions
Should I crate my dog when I leave?
A crate can be useful for a dog already comfortable in it, but a safe room or pen may be better for longer periods or dogs who dislike confinement.
What about houseplants?
Identify each species and keep toxic plants out of reach. Do not rely on appearance or a generic “pet-safe” label.
How do I protect cables?
Use physical barriers, cable covers and furniture placement while providing legal chew options. Unplugging unused devices adds another layer of safety.
Sources & further reading
Daily-care references selected for Dog-Proofing Your Home: A Room-by-Room Checklist. These organizations are independent of Dogtation and are included so readers can verify the underlying guidance.